


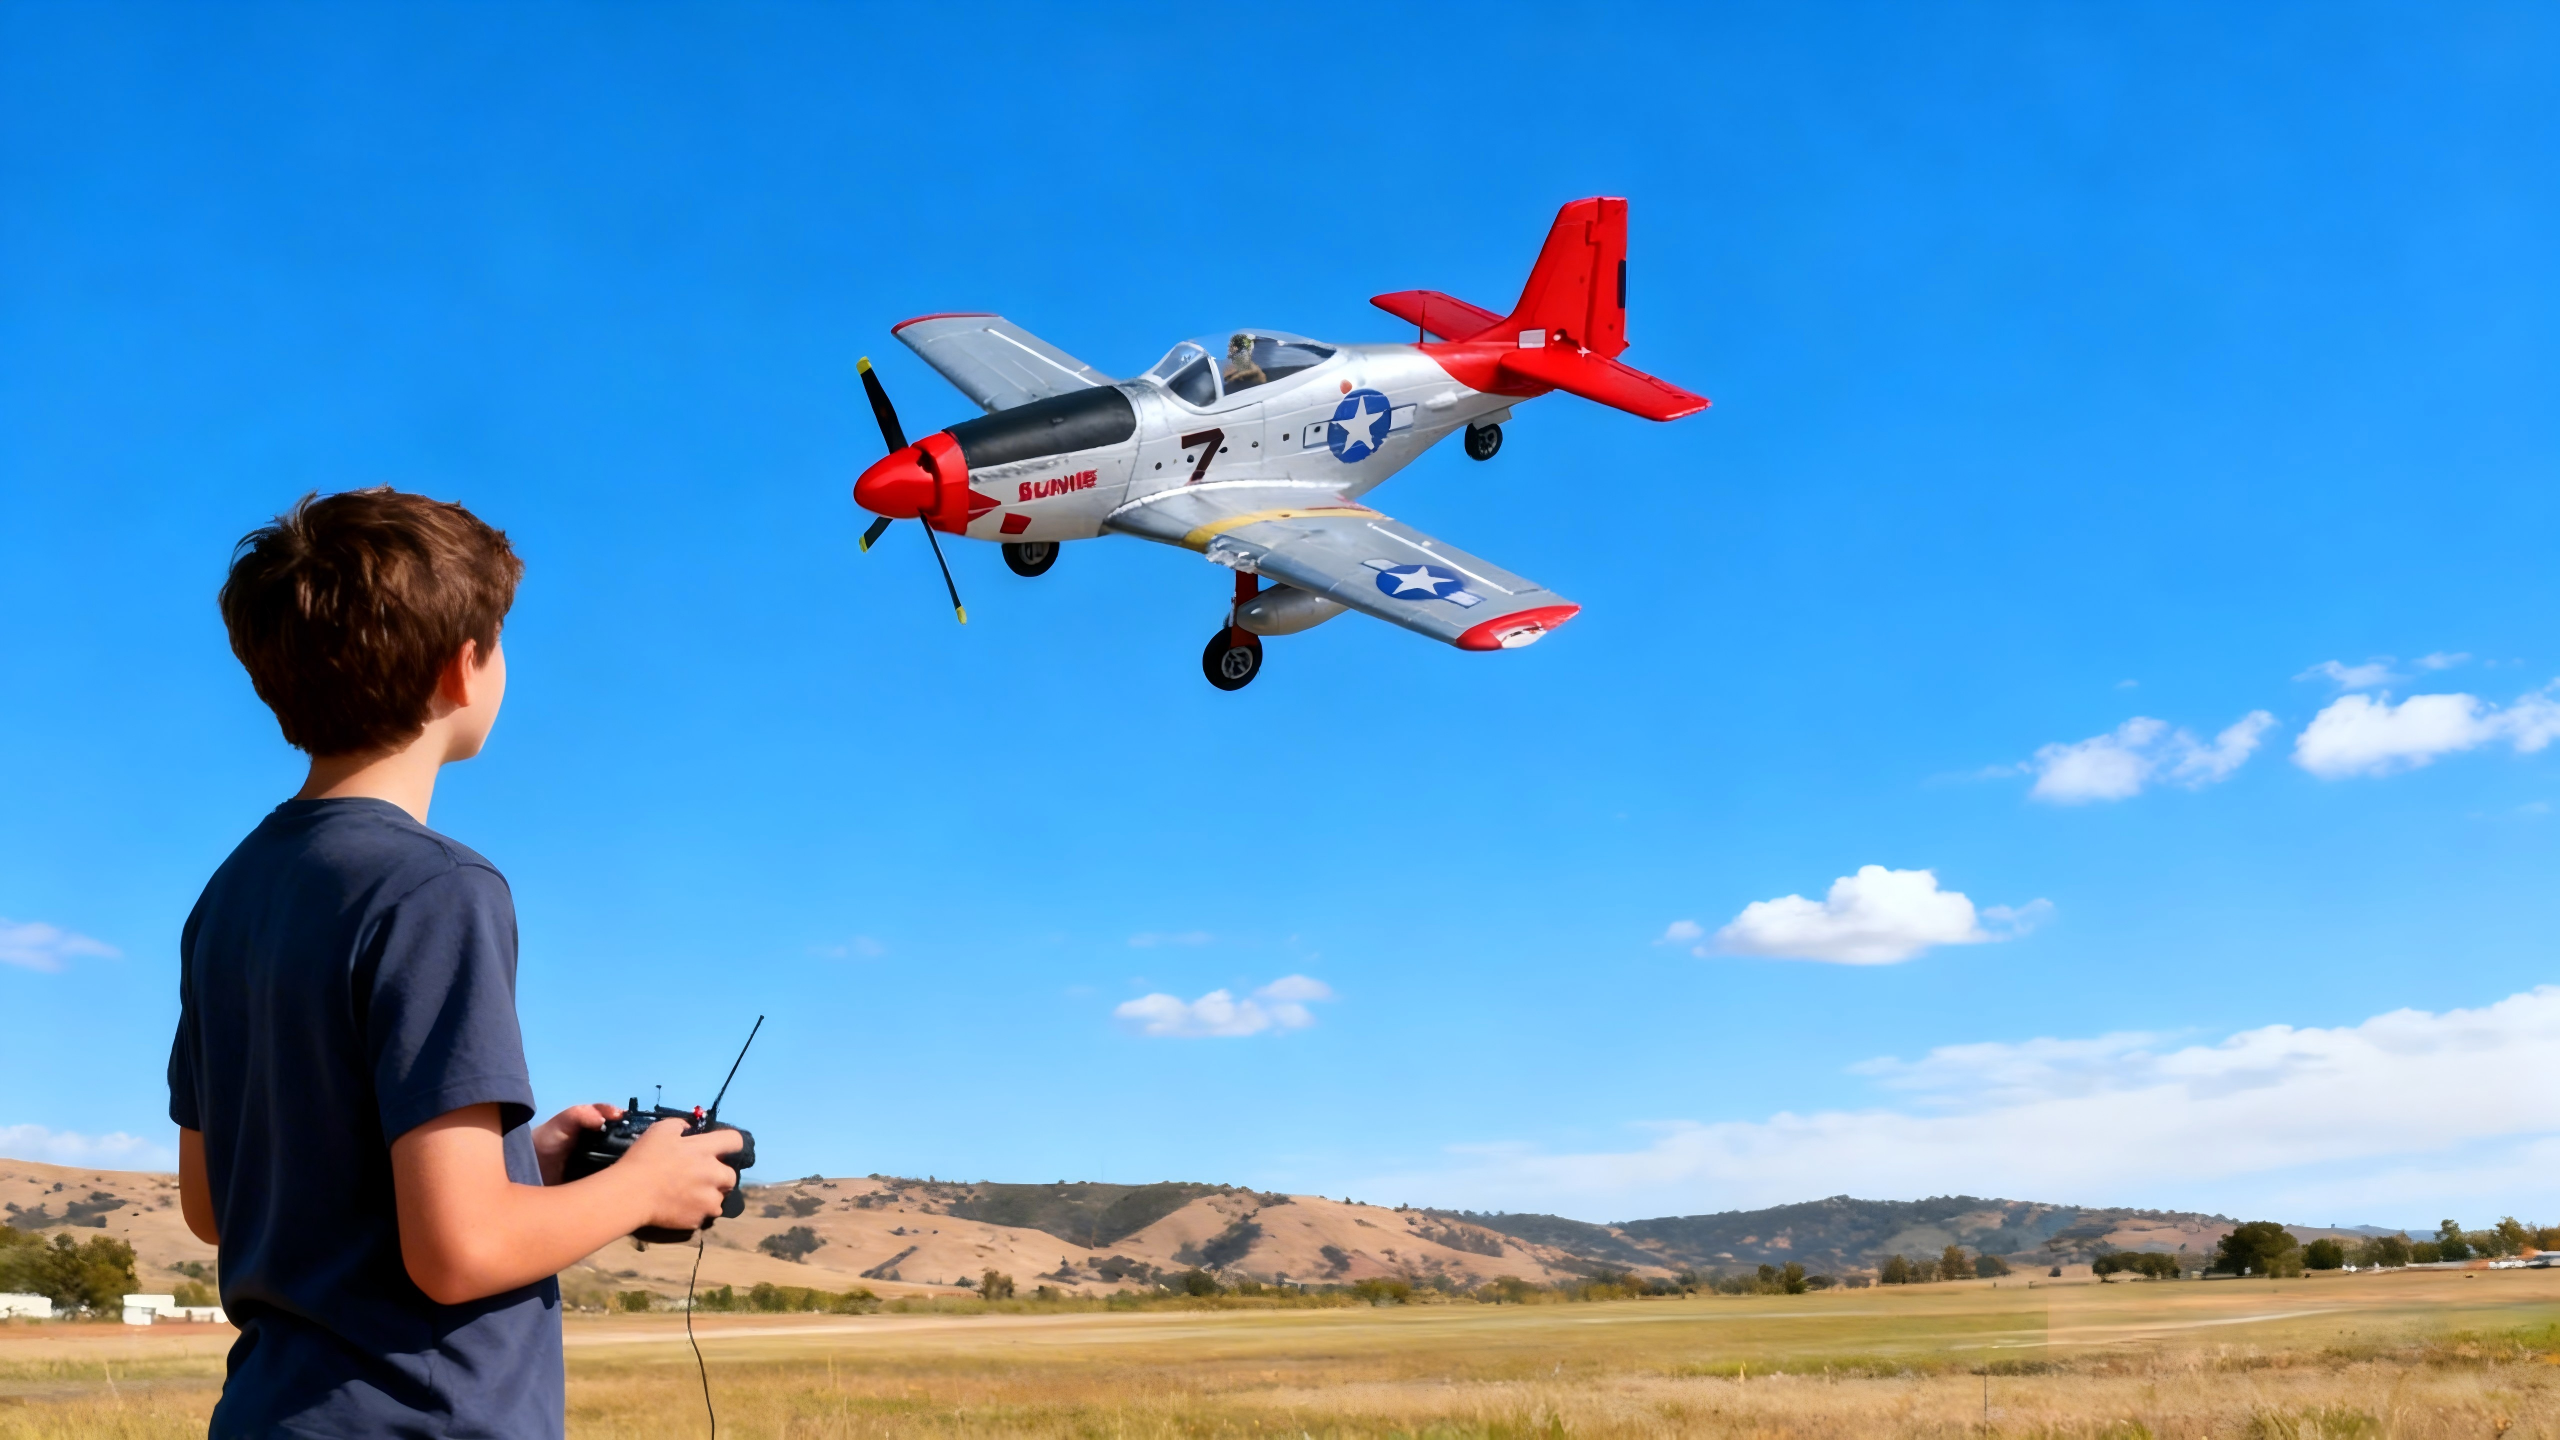
Brushless RC Trainer Plane for Adults: Practical Setup Guide
Adult beginners have different needs than kids: bigger hands, tighter schedules, and a strong preference for gear that just works. If you’re choosing a brushless high‑wing trainer and planning your first flights, this guide gives you the practical numbers and field‑tested steps you won’t always find in product pages—KV, props, batteries, wind limits, Mode 2 setup, and the exact preflight habits that keep your airplane in one piece. Want the short version before you head to the field? Keep reading—then screenshot the quick references.
Key takeaways
-
Brushless power brings longer flights, stronger climb, and better wind penetration versus brushed motors when paired correctly with prop and battery—see the efficiency background in Embry‑Riddle’s Electrically‑Powered Aircraft primer (2023) and the MOSRAC efficiency comparison (2025).
-
For most 1.1–1.2 m trainers, start with 3S 1300–2200 mAh batteries, a 30–40 A ESC, and a 10–11 inch prop sized per the manual.
-
Keep early flights under 12 mph steady wind for 1.1 m wings; step up only after you can land consistently without bouncing. A safety commentary on gust risk from Model Aviation (2023) underscores why.
-
Mode 2 setup matters: center with subtrim, set conservative dual rates with 20–30% expo, and verify failsafe before the maiden.
-
Don’t chase gyro gains until CG and control throws match the manual; tuning starts with balance and basics.
Why brushless matters for adult beginners
Brushless outrunners deliver higher efficiency and usable torque at lower RPM than comparable brushed motors, which translates into practical gains for trainers: cooler running, longer endurance from the same battery, and the thrust margin you need to climb out safely. Think of it this way: less waste heat means more of each milliamp actually turns the prop. According to Embry‑Riddle’s electric‑aircraft overview (2023), brushless systems reduce losses relative to brushed designs. An engineering explainer places brushless vs. brushed efficiencies at roughly 85–90% vs. ~80%—you’ll feel that as extra minutes aloft when you manage throttle.
For RC use, hobby manufacturer guidance adds a pilot‑level perspective: brushless power provides useful headroom for climb and wind penetration on training days. See Horizon’s brushed vs. brushless overview (2025) for pros/cons framed for everyday pilots.
How to choose an RC trainer plane for adults
Adult‑friendly trainers are forgiving, visible in the air, and easy to launch and land on typical fields. Prioritize:
-
Wingspan and wing loading: 1.1–1.2 m is a sweet spot for portability and stability; larger 1.5 m trainers ride gusts better but need more space.
-
Material: EPO/EPP foam resists hangar rash and is repairable with foam‑safe CA.
-
Stabilization: A beginner mode with bank angle limits and autolevel reduces pilot workload, but you should still learn coordinated turns.
-
RTF vs. PNP: RTF bundles save time; PNP lets you reuse transmitter/receiver.
-
Power system basics: match battery cell count, motor KV, prop diameter/pitch, and ESC rating to the model manual.
Below is a conservative starter spec table for common trainer classes. Always confirm your exact model’s manual before flying.
|
Item |
1.1 m trainer starter |
1.5 m trainer starter |
|---|---|---|
|
Battery |
3S 1300–2200 mAh |
3S 2200–3200 mAh (some 4S variants) |
|
Motor KV (indicative) |
900–1200 KV |
750–1000 KV on 4S / 850–1000 KV on 3S |
|
Prop size (indicative) |
10×4.5–10×6 |
11×5–12×6 |
|
ESC rating |
30–40 A |
30–50 A |
|
Stabilization |
Beginner mode with autolevel |
Beginner mode with autolevel |
|
CG reference |
Per manual; many around 25–30% chord |
Per manual |
Author’s note: For a popular 1.1 m pusher trainer, the official page documents a CG window of 67–70 mm from the leading edge. That kind of precision is common—and worth following.
Brushless power trade‑offs you should actually use
Think of KV as your motor’s RPM per volt. Higher KV with the same prop draws more current and can over‑stress the ESC; lower KV can swing a bigger prop for quieter thrust. Practical rules:
-
Keep battery within the airframe’s published limits; most 1.1–1.2 m trainers are 3S‑optimized. If 4S is supported, you’ll often see a lower‑KV motor and a prop adjusted to keep current within the ESC rating.
-
Size props by the manual first, not by guesswork. A 10×4.5 to 10×6 is common on 3S for 1.1 m trainers; larger 1.5 m airframes often run 11–12 inch props.
-
ESC headroom: choose the rating the manual specifies; telemetry‑capable 30–40 A units are typical for the 1.1 m class.
-
Endurance vs. climb: 3S on the recommended prop is the endurance baseline; moving to 4S (if allowed) increases climb and wind penetration but shortens flight time at comparable stick feel.
For gyro‑equipped trainers, tune only after the airplane balances and responds correctly at low rates. A widely used approach is to increase gyro gain slowly until you notice oscillation in calm air, then back off slightly; do this per flight mode once CG and throws are verified. See Spektrum’s gyro setup guidance (2025) and the NX manuals hub for step‑by‑step programming.
Safe wind levels for first flights
Wind guidance isn’t one‑size‑fits‑all, and major safety bodies avoid hard numbers. Still, trainer instructors converge on conservative thresholds that help new adult pilots succeed.
|
Wingspan class |
Suggested steady wind |
Avoid gusts above |
|---|---|---|
|
1.1 m class |
8–12 mph |
15 mph |
|
1.5 m class |
10–15 mph |
18–20 mph |
These are consensus starting points—err on the calm side until your landings are consistent. For context on how gust variability raises incident risk for new pilots, see Model Aviation’s safety commentary (2023).
Mode 2 transmitter setup tips for adult pilots
-
Subtrim and endpoints: Mechanically center control surfaces first; use subtrim to perfect neutral, and check endpoints so servos don’t bind.
-
Dual rates and expo: Start with low rates and 20–30% expo on elevator and aileron for smoother inputs; adopt the manual’s beginner throws if provided.
-
Failsafe: Bind properly, set throttle to low/cut and surfaces to neutral, and run a range test plus a bench failsafe test before the maiden. The Spektrum NX manuals walk through these steps in detail.
Maiden takeoff and landing walkthrough
-
Preflight: verify control direction, range test, battery secure, CG in spec, prop tight, link quality good.
-
Takeoff into wind: roll smoothly to 60–70% throttle, let the wing fly, then add gentle back‑pressure; climb shallowly to a safe height.
-
Trim and circuits: at altitude, add a click or two of trim; fly gentle racetrack patterns.
-
Approach: throttle back early, line up into wind, hold 10–20% throttle to stabilize.
-
Flare and rollout: ease back just above the ground to settle on the mains; keep the nose straight with rudder.
Micro‑examples from the field
-
Battery placement to correct CG: Suppose your trainer’s CG target is 67–70 mm aft of the leading edge. Sliding a 3S 2200 mAh pack forward by 5–10 mm can move CG forward by roughly 1–2 mm depending on tray geometry. Recheck balance every time you change packs, then verify with a calm, level test lap before touching gyro gains. That 67–70 mm range is documented for a well‑known 1.1 m pusher trainer in its official product page noted above.
-
3S to 4S trade‑off on supported airframes: If your model explicitly supports 4S, expect stronger climb and better wind penetration due to higher RPM at a given stick feel. However, current rises quickly with prop choice; keep the prop within the manual’s limits, and confirm peak current is within the ESC rating after any change. Many 1.1–1.2 m trainers remain 3S‑optimized from the factory.
-
Neutral PlayPulse RC example: When dialing in CG on a beginner‑oriented brushless model from PlayPulse RC, shifting the stock battery a few millimeters forward brought the balance right into spec and eliminated the need for nose weight. If you’re considering ready‑to‑fly options with clear support and warranty terms, review the warranty policy and FAQ for confidence before the maiden.

Quick reference you can screenshot
Start here on a 1.1 m trainer: use a 3S 1300–2200 mAh battery, a 10×4.5–10×6 prop, and a 30–40 A ESC sized per the manual. Balance to the published CG before touching gyro gains, trim at altitude, and then adjust gains cautiously. For wind discipline, stay under about 12 mph steady until you can land smoothly three times in a row. Set Mode 2 low rates with 20–30% expo and bench‑test failsafe every session.
Next steps
Ready to choose an RTF with clear after‑sales support? Explore PlayPulse RC and skim the warranty and FAQ before you pick a brushless trainer and head to the field.
Author: A long‑time RC instructor who has helped dozens of adult beginners go from first taxi to confident landings. Safety first, fun always.
Leave a comment
This site is protected by hCaptcha and the hCaptcha Privacy Policy and Terms of Service apply.