

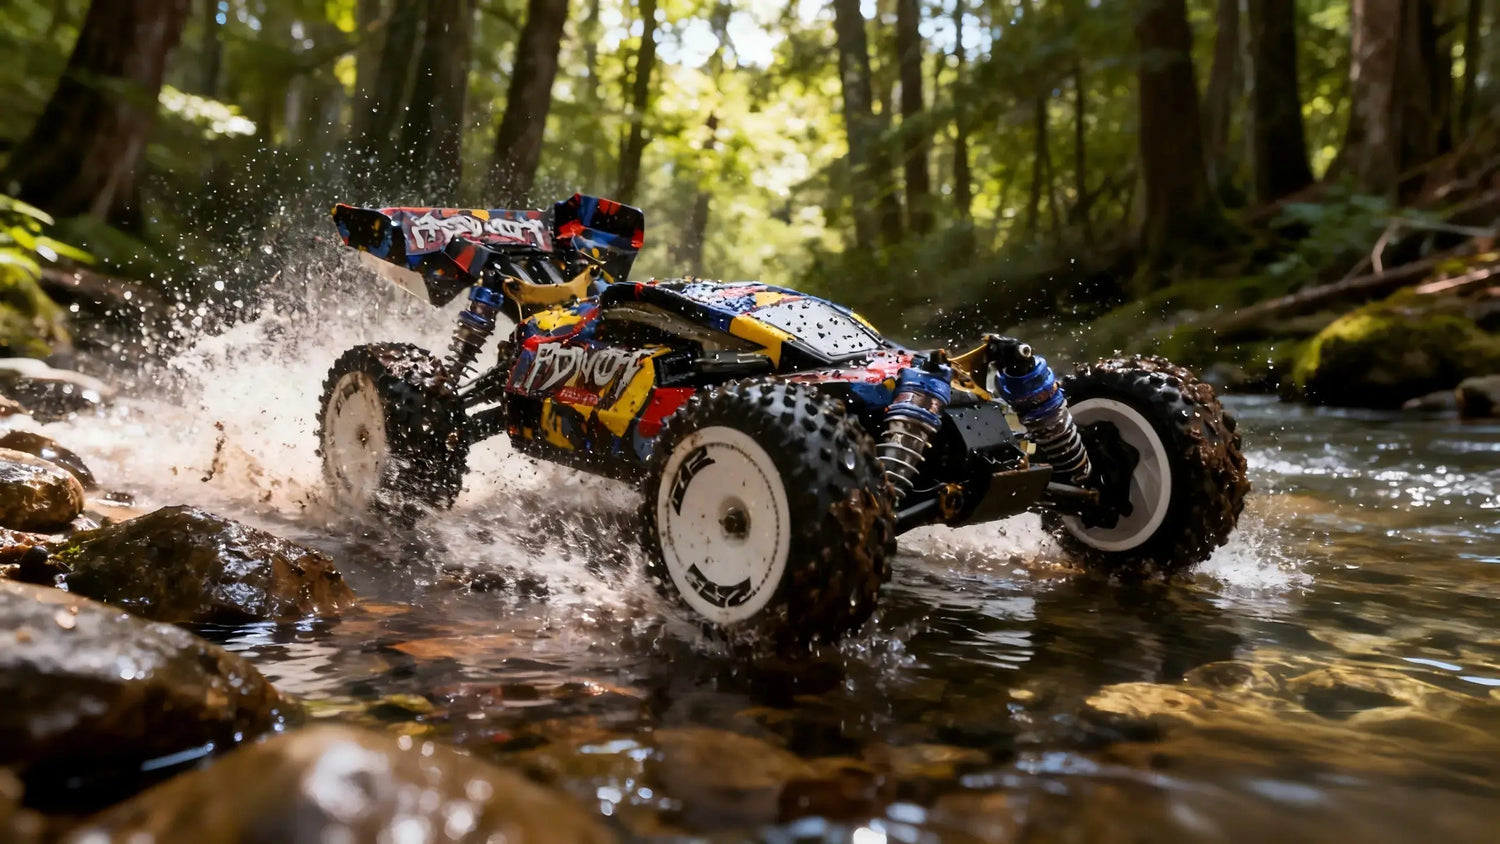
RC Racing Truck Tuning: A Workshop Guide for 4WD Speed and Handling
If you’re chasing lap time without cooking the ESC or shredding a diff, you need a disciplined approach—not random tweaks. This workshop guide distills proven methods for advanced hobbyists (25–55) to unlock speed and 4WD handling on both track and off‑road. We’ll set a solid baseline, then tune power, diffs, geometry, suspension, and radio in a repeatable way with numeric targets and on‑track tests.
Key takeaways
-
Start from a known baseline and change one variable at a time; validate with temps and short timed runs.
-
For 4WD SCT platforms, a heavier center diff often stabilizes acceleration; lighter front/rear can add rotation—verify per surface.
-
Keep motor/ESC temps in the safe window and enable ESC thermal protection; speed gains that overheat electronics aren’t gains.
-
Measure ride height and droop consistently; geometry only works if the chassis is repeatable left to right.
-
Use endpoints, dual‑rate, and expo to get precise steering without servo strain; then fine‑tune mechanical links.
Baseline setup checklist (from box to track‑ready)
A clean baseline turns your RC racing truck tuning into science, not guesswork. Do this before you evaluate handling:
-
Mechanical health: Spin drivetrain by hand; replace or clean gritty bearings. Check wheel nuts, hub pins, and hexes.
-
Gear mesh: Set free rotation with minimal backlash and no tight spots as you rotate the spur; re‑check after tightening. Many race manuals outline this exact method—verify across the full spur circumference [see Horizon/TLR procedure in the TLR manual]. According to the TLR race kit documentation, confirming mesh at multiple spur positions helps prevent localized binding during load.
-
Ride height and droop: Drop‑test to settle, then measure at standard points with a gauge; match left/right precisely. Team Associated’s official manuals describe this drop‑and‑measure workflow for consistency on setup sheets and between runs.
-
Tires: True or at least clean, glue checked, inserts seated. Start with a known tread/compound for the surface.
-
Diffs: Confirm oil types and fill levels; ensure seals aren’t weeping. If the model is used, refresh oils.
-
Electronics: Calibrate radio/ESC; set ESC thermal protection; verify failsafe; fresh, balanced LiPo pack.
-
Documentation: Record all starting values (oils, camber/toe, ride height, pinion/spur, ESC/brake settings). Take a phone photo of each corner setup.
Evidence notes and methods referenced above: ride‑height measurement process per Team Associated manual guidance; mesh check method widely documented in TLR manuals [Team Associated RC10SC manual; TLR 8IGHT‑series procedure].
Powertrain and gearing for RC racing truck tuning
Goal: Gain top speed and punch without overheating or destroying runtime.
-
How to estimate: No‑load RPM ≈ KV × battery voltage. Speed depends on the final drive ratio (FDR), which is (Spur ÷ Pinion) × transmission ratio. Traxxas manuals demonstrate the ratio math and how to evaluate speed changes when you alter pinion/spur; use their method to predict trends before you commit to hardware.
-
Practical workflow: Move in small steps (+1 pinion tooth or −2 spur teeth) and run 2–3 hot laps while logging temps. Keep motor and ESC within the vendor’s safe range and review GPS/space‑limited speed data only as a cross‑check, not the sole goal.
-
Temperature guardrails: Enable ESC thermal protection and set it near the manufacturer’s recommended trip point (≈105°C/221°F is a common Hobbywing baseline). If you hit 85–95°C motor can temps in routine runs, gear down or reduce timing/boost. Sustainable pace beats burst speed.
Reference anchors: Traxxas ratio/speed calculation examples in official manuals; Hobbywing ESC thermal protection recommendations in XR10‑series documentation.
Drivetrain and differential oils: getting 4WD balance
Goal: Control torque distribution and steering feel through front/center/rear diff oils.
-
Typical 4WD SCT trends: Heavier center diff oil limits front/rear bleed under power and calms wheelspin; lighter front diff can increase off‑power steering; rear diff weight influences rotation and on‑power stability. These tendencies are echoed in major manufacturer notes and are widely used by club racers.
-
Numeric starting envelopes (verify for your chassis):
-
High‑grip clay/astro: Front 20k–40k cSt, Center 500k–1M cSt, Rear 15k–30k cSt.
-
Loose dirt/rough: Front 10k–20k cSt, Center 100k–300k cSt, Rear 10k–100k cSt.
-
-
Test protocol: Run a 5‑lap stint. If you see inside‑front ballooning and push on power, raise center weight. If entry push is excessive off power, try a lighter front. If the rear steps out on throttle, raise rear weight slightly.
Evidence anchors: Losi manuals discussing lighter/heavier diff effects; Arrma RTR examples show heavy‑center baselines that inform the ranges above; pro SCT setup sheets provide specific race‑day numbers you can copy when conditions match.

Chassis geometry: camber, toe, caster that actually help
Goal: Achieve crisp turn‑in, mid‑corner support, and stable exits without chewing tires.
-
Practical ranges for 1/10 4WD trucks (start here and adapt to your platform and surface):
-
Front camber: −1.0° to −2.0°. Rear camber: −1.0° to −2.5°.
-
Front toe: 0° to 0.5° toe‑out. Rear toe: 2.5° to 3.0° toe‑in (via blocks or hubs).
-
Caster: Use the common kit options (e.g., 10–15° effective). More caster can boost entry steering while calming exit on many platforms.
-
-
Method notes: Adjust one axis at a time, then re‑square the chassis. Re‑check ride height after geometry changes; camber readings vary with height.
-
Validation: Time two 5‑lap stints. If initial rotation is lethargic, try a touch more front toe‑out or slightly less front camber magnitude. If exits are twitchy, add a bit of rear toe‑in or reduce rear camber magnitude.
Evidence anchors: Effects summarized in Team Associated’s widely used RC tuning cheat sheets; numeric anchors are commonly found in pro setup sheets for the TEN‑SCTE and similar platforms.
Suspension, ride height, and droop: where most feel comes from
Goal: Match spring rates and damping to surface grip and bumps, then set ride height/droop for attitude control.
-
Ride‑height method: Drop the chassis from ~8–12 inches to settle and measure with a gauge at consistent points. Start at ~28–30 mm on high‑grip and ~30–32+ mm on rough dirt, ensuring arms or bones are close to level where recommended by your kit docs.
-
Shock oil and springs: Use your kit baseline, then step oil in 2.5–5 wt increments and springs one rate at a time. Softer setups track bumps but can roll; stiffer cuts roll but might skip on chatter.
-
Droop: More droop helps landings and rough tracks; less droop sharpens response. Measure consistently (center‑to‑center shock length at full extension) and adjust via eyelets or droop screws per your manual.
-
Validation: On a jump section, watch for chassis slap (add pack or oil), nose‑down landings (add front pack/air or slightly stiffer front), or pogo on exit (reduce rebound/pack or soften).
Evidence anchors: Ride‑height measurement and droop methods described in Team Associated and TLR documentation and tuning tips.
Steering, servo, and radio setup for a precise 4WD RC truck setup
Goal: Max steering authority with stability and no hardware abuse.
-
Servo and saver: Use a saver tight enough for accuracy but loose enough to protect gears. High‑torque, fast servos (often ≥20–25 kg·cm, ≈0.10–0.15 s/60° at 6–7.4 V) suit 4WD trucks; confirm per chassis and class.
-
Radio programming sequence: Set endpoints (EPA) so the bellcrank just reaches mechanical stop without strain, then dial steering dual‑rate for on‑track feel, and add a small amount of expo for smoother mid‑corner inputs.
-
Practical steps: Most Spektrum/Futaba surface radios let you select the channel, hold full lock to set each endpoint, then assign dual‑rate/expo to a switch for on‑track A/B testing.
Evidence anchor: Spektrum surface radio manuals detail EPA, dual‑rate, and expo setup workflows that map directly to this sequence.

Surface presets at a glance (starting points)
These are conservative presets to speed up trackside decisions. Always verify temperatures and tire wear, and adjust to your chassis and local rules.
|
Surface |
Front diff (cSt) |
Center diff (cSt) |
Rear diff (cSt) |
Ride height (mm) |
Front camber |
Rear camber |
Front toe |
Rear toe |
|---|---|---|---|---|---|---|---|---|
|
High‑grip clay/astro |
20k–40k |
500k–1M |
15k–30k |
28–30 |
−1.5° |
−2.0° |
0–0.5° out |
2.5–3.0° in |
|
Loose dirt/rough |
10k–20k |
100k–300k |
10k–100k |
30–32+ |
−1.0° |
−1.5° |
0–0.5° out |
2.5–3.0° in |
References: Diff tendencies summarized in Losi documentation and echoed in pro SCT setup sheets; ride‑height method per Team Associated manual conventions; numeric race examples commonly published in TLR TEN‑SCTE sheets.
Maintenance and LiPo safety that keep speed sustainable
-
Pre‑/post‑run checks: Verify screws, hubs, bearings; re‑check ride height; inspect diff weep and shock leaks. Keep a log so you correlate changes to lap time, not to hidden failures.
-
LiPo rules and safety: Major sanctioning bodies cap full‑charge voltage at 4.20 V per cell (8.40 V for 2S) and require safe charging practices. Charging in a LiPo bag, using balance leads, and running homologated hardcase packs are standard expectations at events. Store around 3.7–3.85 V per cell per your pack maker.
-
ESC safeguards: Enable thermal protection near the vendor’s default threshold and back down gearing or timing if you approach it routinely.
Authoritative anchors: IFMAR electric track rules (voltage caps and charging practices); Hobbywing XR10 documentation (thermal protection behavior).
Scenario‑based presets: gifts, family RC race day, and club events
-
Gift‑Ready (easy, durable): Use the kit baseline oils or slightly lighter front (e.g., 10k–15k) for easy turn‑in, keep center moderate (≈100k–300k), and rear mid (≈10k–30k). Ride height mid‑range (≈30 mm). ESC punch low‑to‑medium with strong brake but minimal drag brake (0–5%). This keeps the truck forgiving for new hands and protects driveline parts.
-
Family RC race day (balanced & durable): Front 15k–25k, center 300k–500k, rear 15k–50k. Ride height ≈30–31 mm with a touch more droop for mixed surfaces. Conservative gearing (stock pinion or −1 tooth from your speed setup). EPA and dual‑rate on a switch so different drivers can tame steering on the fly.
-
Club event (speed‑biased, heat‑checked): Front 20k–40k, center 500k–1M, rear 20k–60k. Lower ride height ≈28–29 mm, slightly less droop. Step up pinion by +1 and verify temps after a 3–5 lap flyer. Boost/turbo off to start on mod classes; set max brake strong and drag brake near zero, then iterate based on sector times.
Example tuning walkthrough (PlayPulse RC, neutral micro‑example)
Starting point: A PlayPulse 4WD RTR short‑course truck fresh from the box. Goal: produce a consistent, track‑focused sprint setup for a club‑style layout without overheating.
-
Baseline and safety: Calibrate radio/ESC; enable ESC thermal protection near 105°C. Balance‑charge a 2S hardcase pack and confirm full‑charge voltage within sanctioning limits. See the PlayPulse RC FAQ for general battery and setup notes.
-
Drivetrain service: Open diffs and set oils to front 20k cSt, center 300k cSt, rear 20k cSt as a starting point. Re‑grease ring/pinion if dry; verify shims eliminate lash without binding.
-
Geometry and suspension: Set ride height to 29 mm front/30 mm rear after a drop‑settle. Camber −1.5° all around to start; rear toe‑in at kit value (≈2.5–3.0°). Keep kit shock oil and springs for first test.
-
Gearing and temps: Move from a 15T to 16T pinion (48‑pitch example). Run 3 hot laps, then check motor/ESC temps. If ESC rises above your comfort window, return to 15T or reduce timing.
-
Validation and notes: Log lap times and driver comments. If mid‑corner push persists, try slightly lighter front diff (e.g., 15k) or add 0.5° front toe‑out. If exits are unstable, step rear diff to 30k.
Internal resource: The PlayPulse RC FAQ centralizes policies and beginner setup pointers you can share with new drivers on your family day.
Tools and upgrade priorities (ROI‑focused, brief)
Think of upgrades as multipliers on consistency before outright peak speed. High return items include a quality balance charger and reliable 2S/3S LiPos, fresh performance tires suited to your track, and a programmable ESC/motor combo you can tune in 1–2% increments. Add a temperature gun, camber gauge, and a small notebook; that trio turns guesses into a tuning record.
Next steps
Download your setup sheet template, run the baseline above, then change one thing at a time and log temps and laps—your fastest setup is the one you can repeat on demand.
References (selected, descriptive):
-
Team Associated ride‑height and setup sheet conventions in the RC10SC manual (measurement and baseline method): https://www.horizonhobby.com/on/demandware.static/Sites-horizon-us-Site/Sites-horizon-master/default/Manuals/ASC70006-Manual-EN.pdf
-
Losi manual note on lighter/heavier diff oil effects and general tuning guidance: https://www.horizonhobby.com/on/demandware.static/Sites-horizon-us-Site/Sites-horizon-master/default/Manuals/LOS05020-Manual-EN.pdf
-
TLR TEN‑SCTE 3.0 official page with downloadable pro setup sheets used as numeric anchors: https://www.tlracing.com/product/1-10-ten-scte-3.0-4wd-sct-race-kit/TLR03008.html
-
Traxxas manuals illustrating gear ratio calculations and speed estimation methods: https://images.amainhobbies.com/images/resources/TRA93164-4-WHT/Manuals/1-TRA93164-4-WHT_Traxxas_4-Tec_3.0_BL-2S_1-10_RTR_Touring_Car_with_Toyota_GR_Supra_GT4_Body_Manual.pdf
-
Hobbywing XR10 series manuals recommending ESC thermal protection around 105°C/221°F: https://www.hobbywing.com/en/uploads/file/20221024/c7c899724ffc421cf90154a7960384a0.pdf
-
IFMAR electric track rules covering 4.20 V/cell (2S = 8.40 V) and charging practices: https://www.ifmar.org/wp-content/uploads/2022/12/2023%20Ifmar_WC%20_%20Electric%20ONROAD%20-V2-20Dec%2022.pdf
Internal links for further reading:
-
PlayPulse RC FAQ (battery life, charging, and basic setup pointers): https://www.playpulserc.com/pages/faq
-
PlayPulse RC blog hub for RC toys news and guides: https://www.playpulserc.com/blogs/playpulserc-blog-rc-toys-news


Leave a comment
This site is protected by hCaptcha and the hCaptcha Privacy Policy and Terms of Service apply.